Let's Encrypt on Linux Systems to generate a Wildcard Certificate
Last time, we discussed how to generate a free SSL server certificate using Let's Encrypt here.
This is useful, but the process can be pain when you have LOTS of servers to secure.
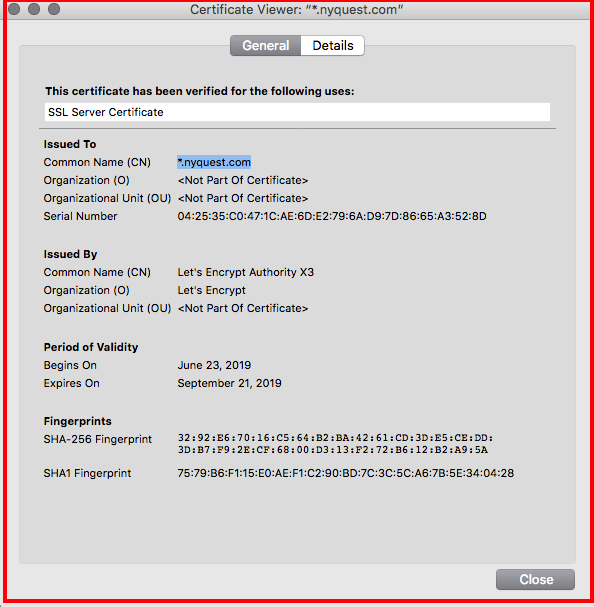
This week, let's go over how to generate a WILDCARD certificate which can be used on an entire domain (e.g. *.nyquest.com)
These certificates, like the previous are fully compatible with all Ellucian Banner® Products (Banner® 9, Banner® SSB, etc)
This process also requires certbot, see the previous post if you don't have this installed.
Before you get started, make sure you have access to your domain's DNS server. The syntax to generate a wildcard cert is the following in linux (run as root, of course):
# certbot certonly --manual --preferred-challenges dns --server https://acme-v02.api.letsencrypt.org/directory --manual-public-ip-logging-ok -d '*.[domain name]' -d [domain name]
Or for the case of Nyquest.com:
# certbot certonly --manual --preferred-challenges dns --server https://acme-v02.api.letsencrypt.org/directory --manual-public-ip-logging-ok -d '*.nyquest.com' -d nyquest.com
Responses which you will type are shown below in blue
[root@admin jchung]# certbot certonly --manual --preferred-challenges dns --server https://acme-v02.api.letsencrypt.org/directory --manual-public-ip-logging-ok -d '*.nyquest.com' -d nyquest.com
Saving debug log to /var/log/letsencrypt/letsencrypt.log
Plugins selected: Authenticator manual, Installer None
Starting new HTTPS connection (1): acme-v02.api.letsencrypt.org
- - - - - - - - - - - - - - - - - - - - - - - - - - - - - - - - - - - - - - - -
You have an existing certificate that contains a portion of the domains you
requested (ref: /etc/letsencrypt/renewal/nyquest.com.conf)
It contains these names: *.nyquest.com
You requested these names for the new certificate: *.nyquest.com, nyquest.com.
Do you want to expand and replace this existing certificate with the new
certificate?
- - - - - - - - - - - - - - - - - - - - - - - - - - - - - - - - - - - - - - - -
(E)xpand/(C)ancel: E
Renewing an existing certificate
Performing the following challenges:
dns-01 challenge for nyquest.com
dns-01 challenge for nyquest.com
- - - - - - - - - - - - - - - - - - - - - - - - - - - - - - - - - - - - - - - -
Please deploy a DNS TXT record under the name
_acme-challenge.nyquest.com with the following value:
123456789muDeKzcGhh_tje3nAsdsdssds
Before continuing, verify the record is deployed.
- - - - - - - - - - - - - - - - - - - - - - - - - - - - - - - - - - - - - - - -
Press Enter to Continue
You now need to prove that you actually own the domain by creating DNS TXT record with the value listed above.
If you are running DNS using Amazon Route 53, this would look like the following: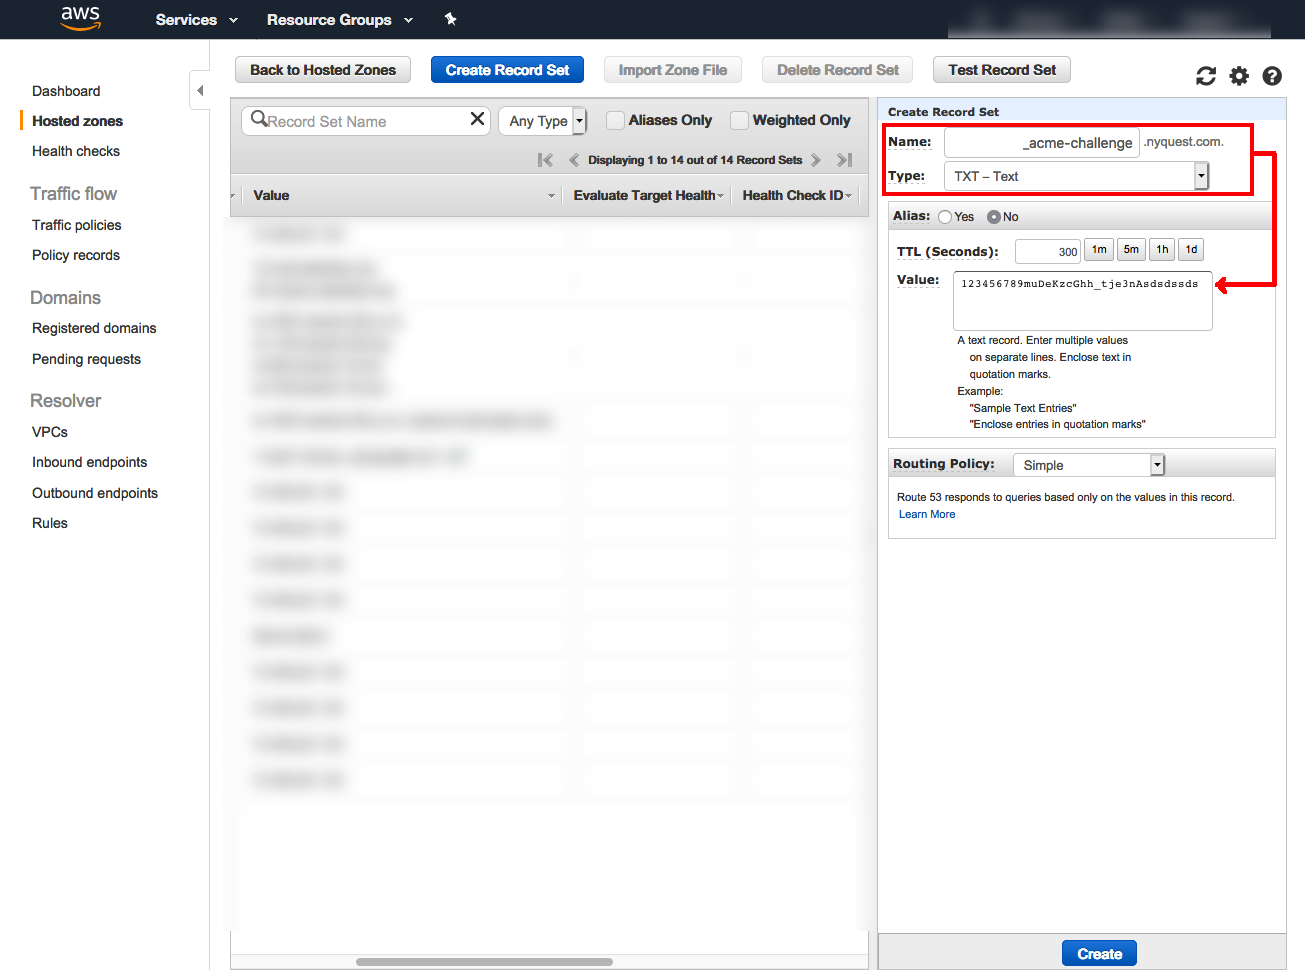
Once you do this, WAIT a few minutes for the changes to take effect. then hit [Enter] to continue.
[Enter]
Resetting dropped connection: acme-v02.api.letsencrypt.orgIMPORTANT NOTES:
- Congratulations! Your certificate and chain have been saved at:
/etc/letsencrypt/live/nyquest.com/fullchain.pem
Your key file has been saved at:
/etc/letsencrypt/live/nyquest.com/privkey.pem
Your cert will expire on 2019-09-21. To obtain a new or tweaked
version of this certificate in the future, simply run certbot
again. To non-interactively renew *all* of your certificates, run
"certbot renew"
- If you like Certbot, please consider supporting our work by:
Donating to ISRG / Let's Encrypt: https://letsencrypt.org/donate
Donating to EFF: https://eff.org/donate-le
At this point you are done. You can now remove that DNS TXT entry which you added in the step above.
Follow the steps in the previous guide to add the new wildcard certificate into Apache HTTPD or Tomcat. For Tomcat 7, you will need to convert the files generated above into a keystore.
For Tomcat 8.5, you can use the PEM files directly as shown below:
<Connector port="8443" protocol="org.apache.coyote.http11.Http11NioProtocol"
     maxThreads="150" SSLEnabled="true">

   <SSLHostConfig>
        <Certificate certificateFile="conf/cert.pem"
                            certificateKeyFile="conf/privkey.pem"
                            certificateChainFile="conf/chain.pem" />
   </SSLHostConfig>
</Connector>
The fine print:
While these certs are valid on your entire domain, keep in mind that they are still only valid for 3 months. Also unlike Let's Encrypt certs for servers, there is currently no easy way to automate this process since it requires you to add a DNS entry.