Setting Up SSL using Let's Encrypt on Linux Systems
_
Are you tired of paying for SSL Certificates? Then consider using Let's Encrypt.
As taken from its Wikipedia Page:
"Let's Encrypt is a non-profit certificate authority run by Internet Security Research Group (ISRG) that provides X.509 certificates for Transport Layer Security (TLS) encryption at no charge. "
And yes, these certificates are fully compatible with all Banner applications such as (Banner 9, SSB, SSOManager, etc).
However, while it's always nice to have stuff for free, keep in mind a couple things.
- The process of generating a certificate requires considerably more tech savvy. Pretty much everything is done on the command line.
- Certificates generated are only valid for 3 months. This short validity is designed to force operators to have the renewal process automated.
This week, let's go over how to install an Let's Encrypt SSL certificate on Redhat/Centos based systems.
It goes without saying that you really should have a grasp of using Linux before continuing onward. In addition you will need to have apache httpd installed as well as root access on the system in question.
Prior to starting, make sure:
- the server in question has apache httpd running, and that it is internet accessible.
- the server hostname (FQDN) is registered in the DNS
1. Install Certbot. The process is documented here for Redhat Centos 7 systems. However it's a bit wordy. if you are lazy like me you just want the commands to type.
For Redhat/Centos 7, run the below commands as root.
# yum install epel-release
# yum -y install yum-utils
# yum-config-manager --enable rhui-REGION-rhel-server-extras rhui-REGION-rhel-server-optional
# yum install certbot python2-certbot-apache
The commands above basically enable the Redthat extended Repository, and then install a utility called CERTBOT, which used to generate the Certificate for Let's Encrypt.
Generating the Certificate
There are numerous was to use certbot, but one of the easier ways is the following (run as root)
# certbot certonly --webroot
You will then be prompted for the hostname that you want a certificate to be generated against, as well as the document root associated with that URL. The Let's Encrypt certificate generation script will attempt to drop a couple files on your server, and then attempt to access those files.
Befow is an example for admin.nyquest.com (user input is outlined in red):
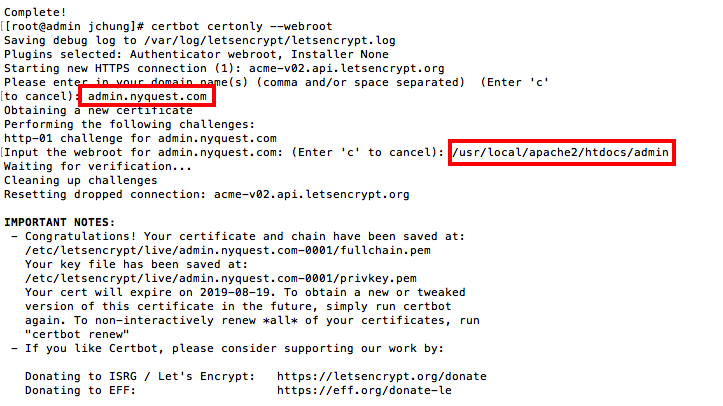
In the example above, the entire certificate bundle (private key, Root CA, certificate) is dropped under /etc/letsencrypt/live/admin.nyquest.com-0001.
You can now use this certificate under apache httpd with a virtual host directive:
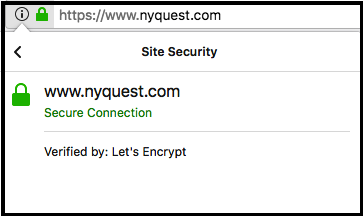
You can view this site here.
The screenshot above was run on 2019.05.21. As you can see, the cert generated are valid for 90 days. You can easily automate the procedure with a cron job that runs every month as shown below taking input from standard IO.
#!/bin/bash

certbot certonly --webroot << EOF
admin.nyquest.com
/usr/local/apache2/htdocs/admin
EOF
For Tomcat 8.5.x you can use the PEM files directly by adding the PEM files to a connector block in server.xml as shown below:
<Connector port="8443" protocol="org.apache.coyote.http11.Http11NioProtocol"
     maxThreads="150" SSLEnabled="true">
   <SSLHostConfig>
        <Certificate certificateFile="conf/cert.pem"
                            certificateKeyFile="conf/privkey.pem"
                            certificateChainFile="conf/chain.pem" />
   </SSLHostConfig>
</Connector>
For earlier versions of Tomcat, you will need to convert it to a JAVA KEYSTORE for use under Tomcat and Banner 9.
There is no way to directly convert a PEM to keystore, you will first need to create a PKCS12 file using openssl. The syntax for this is:
openssl pkcs12 -export -in [full path to RootCA] -inkey [full path to private key] -certfile [full path to certificate] -out [path to out pkcs12 file]
# openssl pkcs12 -export -in /etc/letsencrypt/live/admin.nyquest.com-0001/fullchain.pem -inkey /etc/letsencrypt/live/admin.nyquest.com-0001/privkey.pem -certfile /etc/letsencrypt/live/admin.nyquest.com-0001/cert.pem -out root.pkcs12
Enter Export Password:
Verifying - Enter Export Password:
[root@admin ~]# ls -l root.pkcs12
-rw-r--r--. 1 root root 5621 May 22 14:14 root.pkcs12
The PKCS12 file can then be directly imported into the keystore using keytool. The syntax for this command is:
keytool -importkeystore -deststorepass [keystore pass] -destkeystore [full path to keystore] -srckeystore [full path to PKCS12 file] -srcstoretype PKCS12
# keytool -importkeystore -deststorepass ********* -destkeystore /root/SSL/key.jks -srckeystore root.pkcs12 -srcstoretype PKCS12